1 调试代码 1 2 3 4 5 6 7 8 9 10 11 12 13 14 15 16 17 18 19 20 21 22 23 24 25 26 27 28 29 30 31 32 33 34 35 36 37 int main () true ;"/tmp/rocksdb_ctest_put" ;"/wal" ;"/sst" ;"/flash_path" , 512 },"/hard_drive" , 1024 }};auto * env = rocksdb::Env::Default ();CreateDirIfMissing (dbName);CreateDirIfMissing (walDir);CreateDirIfMissing (sstDir);CreateDirIfMissing (sstDir + "/flash_path" );CreateDirIfMissing (sstDir + "/hard_drive" );auto s = rocksdb::DB::Open (options, dbName, &db);assert (s.ok ());for (int i = 0 ; i < 10 ; ++i) {Put (rocksdb::WriteOptions (), "hello" + std::to_string (i),"world" + std::to_string (i));Get (rocksdb::ReadOptions (), "hello" , &value);Flush (rocksdb::FlushOptions ());return 0 ;
2 安装必要的工具用来解析文件 直接在主机上安装rocksdb,在解析文件的时候要用到这些自带的工具
1
2
3
brew install rocksdbls $(brew --prefix rocksdb)/bin
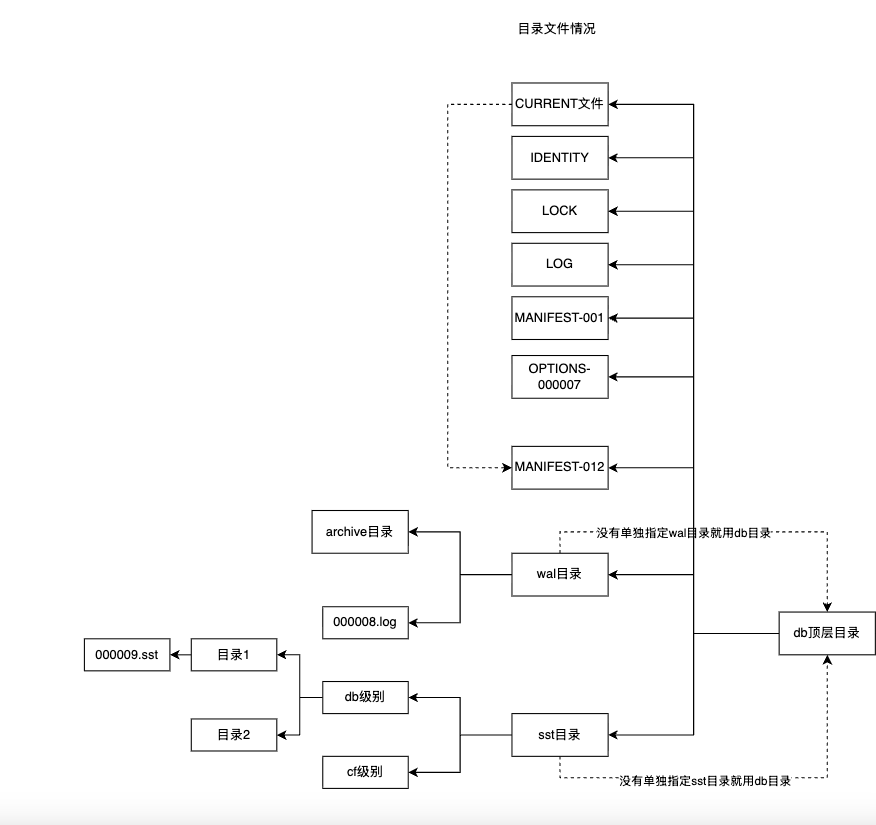
3 启动前准备重要的目录文件 上面代码运行完会生成下面的这些文件
1
2
3
4
5
6
7
8
9
10
11
12
13
14
➜ rocksdb_ctest_put tree
4 用磁盘上的文件恢复内存结构状态 上面的这些目录和文件中,都会多多少少存在着数据,RocksDB需要用这些数据来恢复态,本质上恢复的不仅仅是数据本身,而是恢复如何解释数据
4.1 manifest重建VersionSet 1 2 Iterate (reader, &log_read_status);
RocksDB源码-0x08-MANIFEST文件
4.2 wal重建内存数据库 RocksDB源码-0x05-WAL